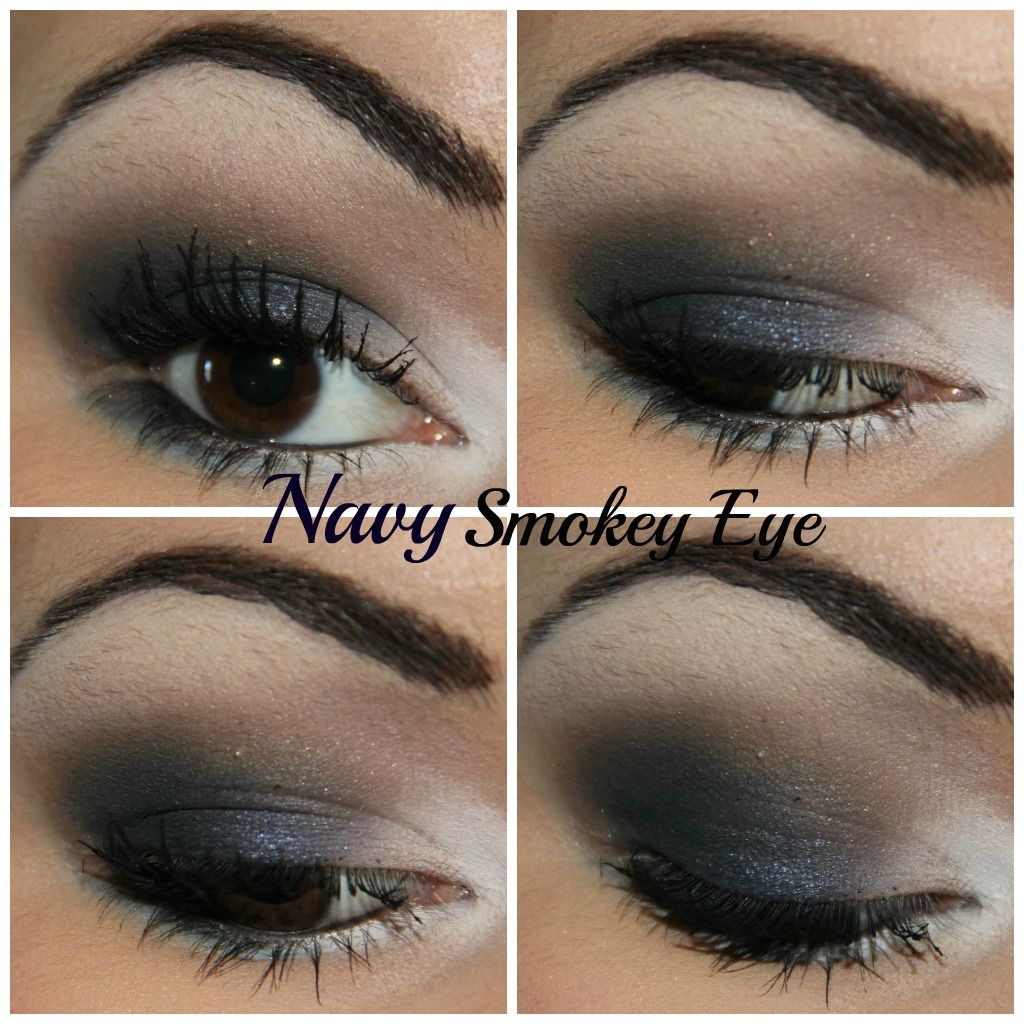
Since I got a lot of great feedback on my last tutorial, I thought I'd do a tutorial on my favorite way to wear MAC Contrast, with a smokey eye. Enjoy!
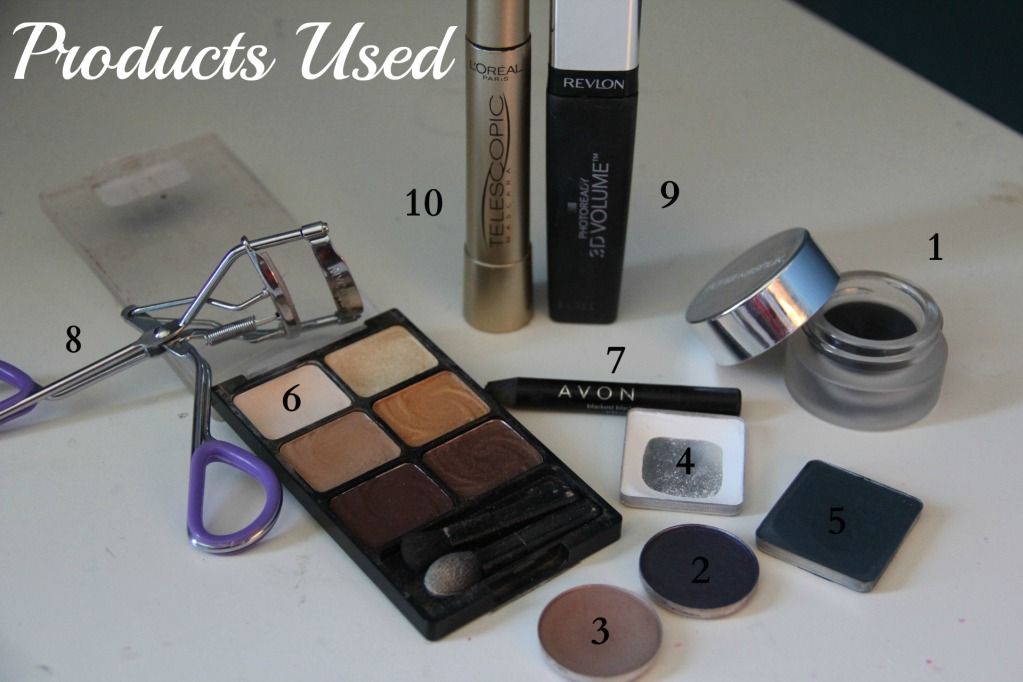
Products Used (in order of use, with shade descriptions and dupe, if applicable):
*MAC Paint Pot in Painterly (not shown)1. Sonia Kashuk Dramatically Defining Long Wear Gel Eyeliner in Charcoal Grey
2. MAC Eyeshadow in Contrast (purple-ish blue with blue pearl) [dupe: MAC Deep Truth]
3. MAC Eyeshadow in Wedge (soft muted beige taupe) [dupe: mid-tone brown from WNW Vanity Palette]
4. Inglot Eyeshadow in Matte 318 (intense matte white) [dupe: MAC Mylar]
5. Inglot Eyeshadow in Matte340 (peacock blue) [dupe: MAC Plumage]
6. Wet N' Wild Brule Eyeshadow from Vanity Palette (matte ivory)
7. Avon Black Eyeliner
8. NYX Eyelash Curler
9. Revlon PhotoReady 3D Volume Mascara
10. Loreal Telescopic Mascara
Brushes/Tools Used (in order of use):
1. Sephora Dome Smudge Brush 2. Sigma E60 Large Shader Brush
3. Sigma E25 Blending Brush
4. Sigma E55 Eye Shading Brush
5. Sephora Shader Brush
6. Sephora All Over Shadow Brush
7. Sigma E30 Pencil Brush
8. NYC Eyelash Curler
Prime your eyes before beginning! (not shown)
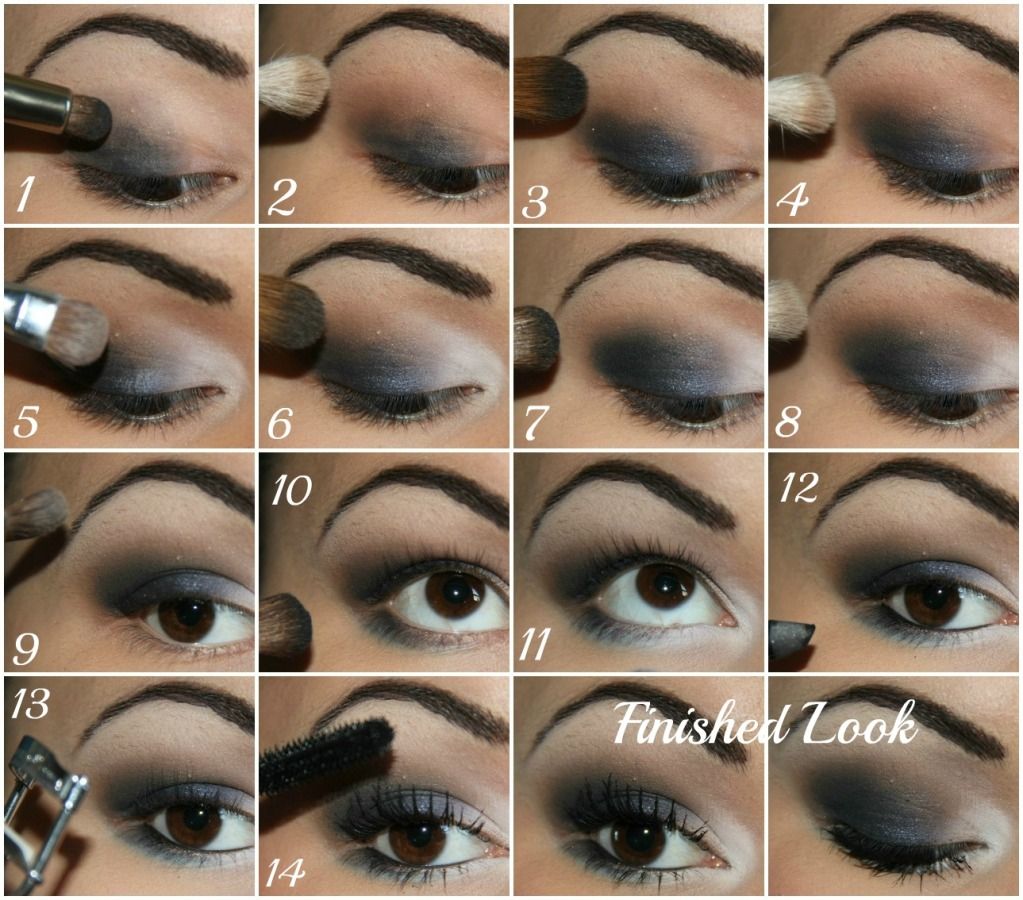
1. Apply a gray or black gel eyeliner as a base on the outer half of eyelid with a densely packed brush or your ring finger. Blend out as much as possible to avoid creasing. Don't worry if it looks patchy! (I used a liner with a dryer formula because cream products crease very easily on me, hence the patchiness.)
2. With a blending brush, apply Wedge through the crease making sure to blend out the edges of the base.
3. Apply Contrast with a large shader brush over where you applied the gray or black base.
4. Apply Wedge into the crease with a blending brush, blending out the harsh edges.
5. With a small shader brush, apply Inglot Matte 318 to the inner corner and inner half of lid, slightly overlapping Contrast.
6. Go back in with the large shader brush and a bit more Contrast and go back over where you first applied it to bring back its intensity and to blend it into the white shadow.
7. With a shader brush, apply Inglot Matte 340 to the outer corner in an angled shape. Bring it slightly into the crease, no more than 1/3 of the way in.
8. Go back in with Wedge on the same blending brush to blend everything out once more.
9. With a fluffy shadow brush, apply an ivory shade to the brow bone.
10. With the tip of a shader brush, apply Contrast to the outer half of the lower lashline.
11. With a small shader brush, apply Inglot Matte 318 to the inner half of the lower lashline.
12. Apply black eyeliner to the waterline and tight line your upper waterline, if preferred.
13. Curl your eyelashes! (optional)
14. Apply mascara! I always layer my mascaras.
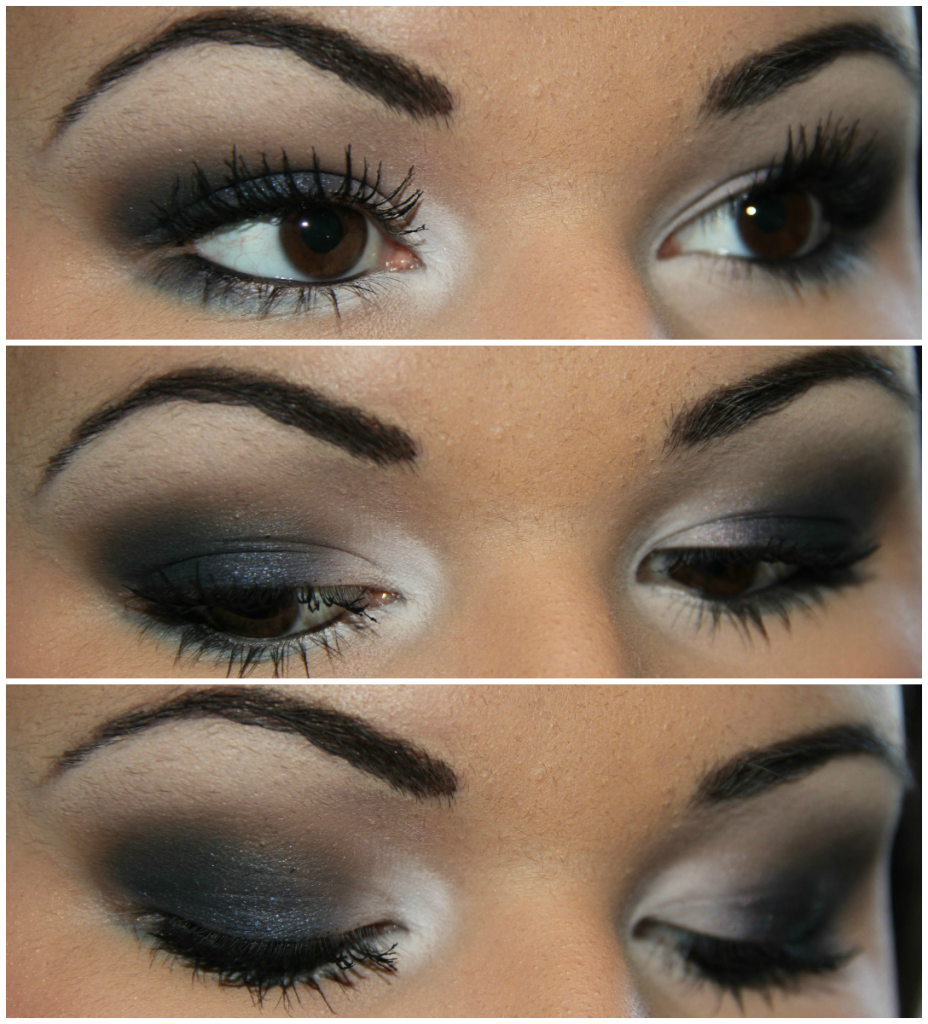
Voila`!
If you're wondering what I used on the rest of my face, when I do this look I like to use peachy pink shades for the cheeks and lips, to balance out the blue in the eyes. I also make sure to bronze my face to avoid lookig washed out, since the eyes are so dark. Here's what I used:
Cheeks:
MAC Blush in Blunt (contour)MAC Bronzing Powder in Refined Golden (bronzer)
NARS Blush in Orgasm (blush)
Lips:
Revlon Super Lustrous Lipstick in Primrose mixed withRevlon Colorburst Lipstick in Soft Nude
Pixi Lip Booster in Leanan
The Finished Look:


